

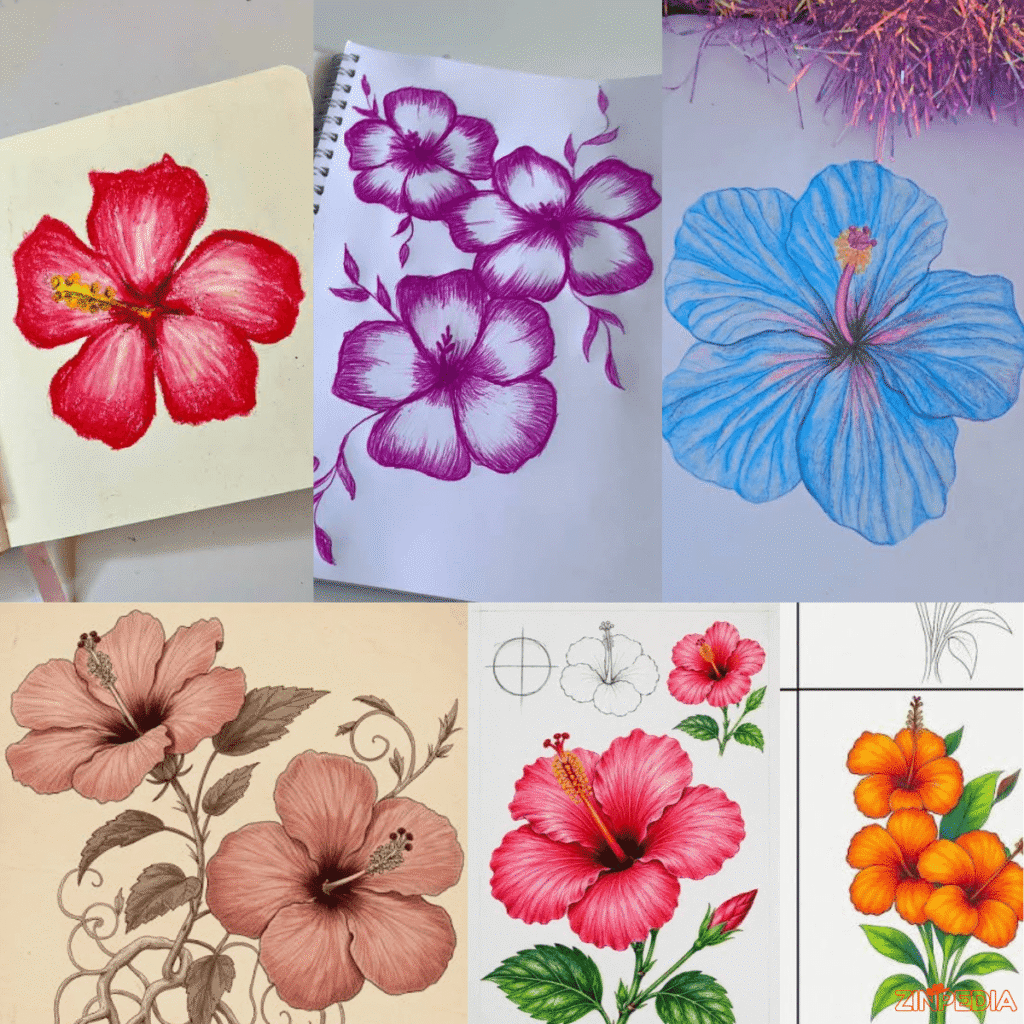
Drawing a hibiscus flower can look difficult because of its large flowing petals, deep center, and long pollen-covered stamen. However, the flower becomes surprisingly easy to sketch when you divide it into simple shapes. Instead of trying to create every detail at once, you can begin with a small center, build five overlapping petals around it, and gradually add natural curves, shading, leaves, and color.
This beginner-friendly hibiscus flower drawing tutorial explains the complete process in clear steps. You will learn how to draw a simple hibiscus outline, create realistic petals, shade the flower with pencils, and add color without making the final artwork look flat or artificial.
You do not need expensive art supplies or professional drawing experience. A pencil, eraser, paper, and a little patience are enough to begin.
Understanding the Shape of a Hibiscus Flower
Before starting your hibiscus flower sketch, it helps to understand the main features that make this flower recognizable.
A typical hibiscus bloom has five broad petals arranged around a deep central opening. Its petals often overlap and curve outward, creating a soft trumpet-like shape. One of its most noticeable features is the long central column that extends beyond the petals. This structure includes the style, stigma, and pollen-producing anthers.
The most important parts to observe are:
- Five large, rounded petals
- Slightly uneven or wavy petal edges
- A dark or deeply shaded flower center
- A long central stamen or reproductive column
- Small rounded anthers near the upper section
- Five stigma tips at the end
- Broad green leaves with visible veins
Do not worry about making every section scientifically exact. In art, your main goal is to capture the flower’s overall character.
A hibiscus looks natural when its petals are not perfectly equal. One petal may appear larger because it is closer to the viewer, while another may be partly hidden behind the central column. These small differences give the flower depth and movement.
Materials Needed for a Hibiscus Flower Drawing
You can create a beautiful hibiscus drawing with basic supplies. Beginners should avoid buying too many materials before learning the fundamental shapes.
For a simple pencil drawing, you will need:
- Drawing paper or a sketchbook
- An HB pencil for the first outline
- A 2B or 4B pencil for darker shading
- A clean eraser
- A pencil sharpener
- A blending stump, cotton bud, or tissue
For a colored hibiscus illustration, you may also use:
- Colored pencils
- Watercolor pencils
- Markers
- Gel pens
- Fine-liner pens
- Watercolor or acrylic paint
Smooth paper works well for markers and clean line art. Slightly textured paper is better for graphite shading and colored pencils because it holds more layers of pigment.
Keep your first lines very light. Light construction lines are easier to erase and correct than dark marks pressed firmly into the paper.
How to Draw a Hibiscus Flower Step by Step
The following method works for children, beginners, art students, and anyone who wants to create an easy hibiscus flower drawing.
Step 1: Mark the Flower’s Center
Draw a small, light circle near the middle of your paper. This circle represents the deep center from which the petals will grow.
It does not need to be perfectly round. In fact, a slightly oval shape may look more natural, especially when the flower is viewed from an angle.
Next, draw a larger circular guideline around the small center. This outer guideline will help you control the approximate size of the petals.
Do not make either circle dark. They are only temporary guides.
Step 2: Plan the Five Petals
Divide the space around the central circle into five loose sections.
You can imagine the flower as a simple five-point arrangement. Draw one curved guideline extending outward for each petal. These lines should spread in different directions like the spokes of a wheel.
Avoid making the spacing mathematically perfect. Natural hibiscus petals often overlap and vary slightly in size.
For a more dynamic drawing:
- Make the bottom petal slightly larger
- Allow one side petal to overlap another
- Tilt the top petals in different directions
- Leave some open space for the central stamen
These choices prevent your flower from looking like a flat symbol.
Step 3: Draw the First Petal
Begin with the petal closest to the viewer, usually the lower petal.
Draw a curved line moving outward from the flower center. Widen the shape as it moves away from the center, then create a rounded or softly wavy outer edge.
Bring the second side of the petal back toward the center.
Hibiscus petals are broad rather than narrow. Their edges may have gentle waves, folds, or shallow irregularities. Avoid sharp zigzag lines unless you are creating a decorative or cartoon style.
Step 4: Add the Remaining Petals
Draw the other four petals one at a time.
Each new petal should begin near the central opening and expand outward. Allow some petals to disappear behind others. Overlapping is essential because it shows which forms are in front and which are farther away.
A useful order is:
- Draw the bottom petal.
- Add the lower-left petal.
- Draw the upper-left petal behind it.
- Add the upper-right petal.
- Finish with the lower-right petal.
You do not have to follow this order exactly, but working from the front petals toward the back can make the overlaps easier to understand.
Check the overall balance before adding details. The flower should feel open, full, and slightly asymmetrical.
Step 5: Draw the Long Central Stamen
The long central column is the feature that makes a hibiscus drawing instantly recognizable.
Start near the flower’s center and draw two narrow, gently curved lines extending outward. Join them near the end to form a long tube-like shape.
Do not make the column completely straight. A slight curve gives it a more natural and graceful appearance.
Add several small oval or circular shapes along the upper section. These represent the pollen-bearing anthers. At the tip, draw approximately five small rounded stigma pads.
Keep these shapes small enough that they do not overpower the petals.
Step 6: Add Folds and Petal Veins
Now add a few curved lines inside each petal.
Begin the lines near the flower center and let them follow the direction of the petal. Some lines can stop halfway, while others may extend closer to the outer edge.
These inner lines represent folds, veins, and changes in the surface.
Use fewer lines than you think you need. Too many heavy lines can make a soft flower look hard and crowded.
A good approach is to place:
- Darker folds near the center
- One or two long veins in each petal
- Short curved marks near overlapping edges
- Gentle creases where a petal bends
The curves should follow the shape of the petal rather than cutting across it randomly.
Step 7: Clean the Final Outline
Once you are satisfied with the basic structure, erase the large circular guideline and any unwanted construction marks.
Redraw the final edges using a clean pencil or fine-liner.
Vary the thickness of your outline. Use slightly darker lines where one petal overlaps another and lighter lines along soft outer edges.
This variation makes the drawing more expressive than an outline with the same thickness everywhere.
How to Shade a Realistic Hibiscus Flower
Shading changes a simple outline into a three-dimensional hibiscus flower drawing.
The easiest way to shade correctly is to choose a light direction before starting. Imagine that light is coming from the upper-left side of the page. The upper-left areas will remain lighter, while lower-right folds and overlapping sections will become darker.
Begin With Light Shading
Use an HB or 2B pencil and apply a soft layer around the flower center.
Gradually extend the shading outward into the petals. Reduce the pressure as you move away from the center so that the tone fades smoothly.
The center of a hibiscus is usually one of the darkest areas in the drawing because the petals curve inward there.
Darken the Overlapping Areas
Whenever one petal sits in front of another, add a narrow shadow beneath the front petal.
This small shadow creates separation and makes the layers easier to see.
Darken:
- The base of each petal
- Areas beneath overlapping edges
- Deep folds and creases
- One side of the central column
- The space behind the stamen
Do not shade the entire flower evenly. Realistic shading depends on contrast between light and dark areas.
Follow the Direction of the Petals
Your pencil strokes should follow the way each petal grows.
Use curved strokes moving from the center toward the outer edge. Straight horizontal scribbles will flatten the flower, while directional strokes help describe its rounded surface.
For smoother shading, gently blend the graphite using a blending stump, cotton bud, or folded tissue. Do not over-blend every area. A combination of soft tones and visible pencil strokes often creates a more natural result.
Add Final Highlights
Use a clean eraser to lift thin highlights from the petals.
Highlights are especially effective:
- Along raised petal folds
- Near the outer edges
- On the light-facing side of the stamen
- Between two darker shaded areas
A kneaded eraser is useful for creating soft highlights, but a regular eraser can also work when used carefully.
How to Color a Hibiscus Flower Drawing
Hibiscus flowers appear in many colors, including red, pink, yellow, orange, peach, white, and purple.
You may use a reference photograph or create your own color combination.
Red Hibiscus
For a classic red hibiscus:
- Apply a light red or pink base layer.
- Add deeper red near the flower center.
- Use burgundy or dark purple in the deepest folds.
- Add orange-red to the light-facing areas.
- Leave a few narrow highlights uncolored.
- Use yellow or orange for the anthers.
Do not begin with the darkest red. Building several light layers creates a smoother result.
Pink Hibiscus
Start with pale pink across the petals. Add rose or magenta near the center and beneath overlapping edges.
A small amount of purple can be added to the shadows. Use a white pencil or leave parts of the paper visible to create soft highlights.
Yellow Hibiscus
Use pale yellow as the base, followed by golden yellow and light orange near the center.
Because yellow is naturally light, use brown, ochre, or muted orange for the shadows instead of black. Heavy black shading can make yellow petals appear dirty.
White Hibiscus
A white flower should not be left completely blank.
Use very light gray, lavender, blue, or pale pink to show shadows and folds. Keep most of the paper white, but add enough subtle shading to define the petals.
The center may be red, pink, or yellow, creating an attractive contrast.
Adding Green Leaves
Hibiscus leaves can be drawn as broad pointed shapes with toothed or gently serrated edges. Add one main vein through the center and smaller veins branching toward the sides.
Use:
- Light green for the base
- Dark green near the stem
- Yellow-green on illuminated areas
- Blue-green or dark green in the shadows
Avoid coloring every part with one shade of green. Layering two or three greens makes the leaves look more realistic.
Common Hibiscus Drawing Mistakes and How to Fix Them
Even a simple flower drawing can look unnatural when its structure is rushed. Understanding common mistakes will help you improve faster.
Making Every Petal Identical
Perfectly equal petals often make the flower look like a logo.
Change the angle, width, and curve of each petal. Allow some petals to overlap or appear partly hidden.
Using Heavy Lines Too Early
Dark construction lines are difficult to erase and may remain visible beneath your finished artwork.
Begin with gentle pencil pressure. Darken only the lines you decide to keep.
Drawing a Flat Center
A hibiscus flower has depth near its center.
Add darker shading where the petals meet and gradually lighten the color as it moves outward. This creates the appearance of petals curving inward.
Making the Stamen Too Thick
The central column should be noticeable but not so large that it dominates the flower.
Keep it narrow, curved, and proportional to the petals. Add small anthers instead of large circles.
Outlining Every Detail in Black
Strong black outlines can work for cartoons, tattoos, and graphic illustrations. However, they may reduce realism in a soft botanical drawing.
Use colored outlines, light pencil lines, or varied line weight when creating a natural style.
Adding Random Shading
Shadows should follow one consistent light source.
Choose the direction of the light and keep the opposite areas darker throughout the drawing.
Overworking the Petals
Too many veins, folds, shadows, and edge details can make the flower appear messy.
Step away from the drawing occasionally and view it from a distance. Stop when the flower looks clear and balanced.
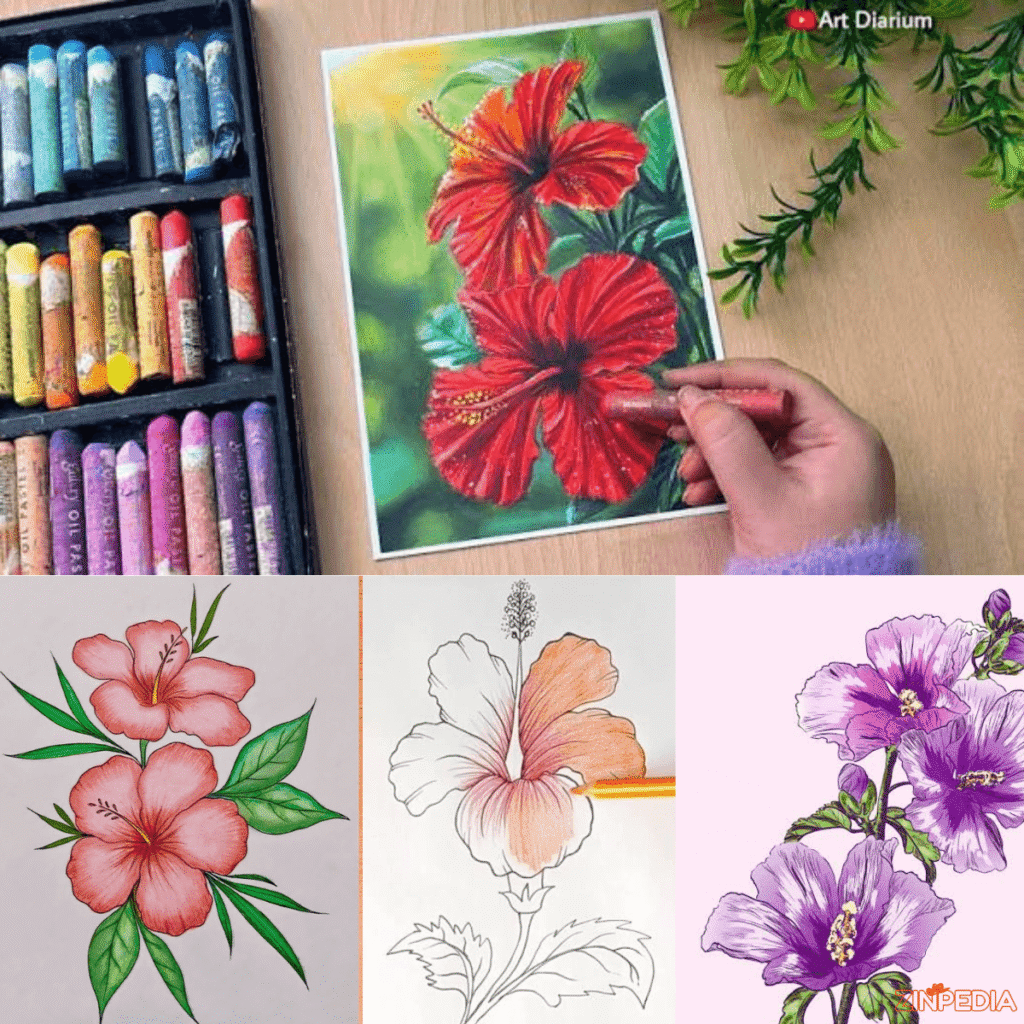
Creative Hibiscus Flower Drawing Ideas
Once you understand the basic structure, you can use the hibiscus in many different art styles and projects.
Simple Hibiscus Line Drawing
Create the flower using clean outlines without shading. This style is useful for coloring pages, logos, stickers, embroidery patterns, and digital graphics.
Realistic Pencil Sketch
Use graphite pencils to focus on texture, light, and petal folds. Add several leaves and a softly shaded background for a complete botanical composition.
Watercolor Hibiscus
Draw a very light outline and apply loose watercolor washes. Let pink, red, orange, or yellow blend naturally across the petals.
Keep the outer edges soft in some areas and sharper in others.
Tropical Illustration
Combine the hibiscus with palm leaves, monstera leaves, ocean waves, seashells, or tropical birds.
This style works well for posters, greeting cards, summer invitations, and fabric patterns.
Hibiscus Tattoo Design
Use a strong flowing outline with simplified shading. Consider placing the flower beside waves, butterflies, names, geometric shapes, or meaningful dates.
A tattoo artist should adjust the final design for placement, scale, and long-term clarity.
Hibiscus Mandala
Place a hibiscus in the center of a circular pattern. Repeat petals, leaves, dots, and curved lines around it to create a decorative symmetrical design.
Digital Hibiscus Drawing
Use separate layers for the sketch, line art, base colors, shadows, and highlights.
Digital layers allow you to correct shapes, test color combinations, and change the background without damaging the original drawing.
Tips for Improving Your Flower Drawing Skills
Drawing flowers becomes easier through observation and repetition rather than perfection.
Use these practical tips:
- Study real hibiscus photographs from different angles.
- Draw the flower at least three times instead of judging your first attempt.
- Practice individual petals before drawing the complete bloom.
- Use light guidelines to control size and placement.
- Observe where petals overlap.
- Keep your wrist relaxed while drawing curved lines.
- Turn the paper when a curve feels uncomfortable.
- Compare light and dark areas before adding fine details.
- Save older drawings so you can see your progress.
- Experiment with front, side, and three-quarter views.
You can also create a small flower sketchbook. Draw one hibiscus each day using a different angle, color, or medium. After a few weeks, your control of curves, shading, and proportions will improve noticeably.
Frequently Asked Questions About Hibiscus Flower Drawing
Is a hibiscus flower easy to draw?
Yes. A hibiscus flower is suitable for beginners when it is divided into simple sections: a central shape, five broad petals, and a long stamen. Starting with light guidelines makes the proportions easier to manage.
How many petals should a hibiscus drawing have?
A recognizable single hibiscus flower is commonly drawn with five main petals. Some cultivated hibiscus varieties have double flowers and may appear to have many additional petals.
What is the long part in the center of a hibiscus?
The long structure extending from the center contains the flower’s reproductive parts, including the style, stigma, and pollen-bearing anthers. It is an important visual feature in a realistic hibiscus illustration.
Which pencil is best for drawing a hibiscus flower?
An HB pencil is suitable for the initial sketch. A 2B or 4B pencil can be used for darker folds, shadows, and the flower center. You may also use a harder pencil, such as 2H, for very light guidelines.
How can I make hibiscus petals look realistic?
Use curved outlines, uneven edges, overlapping petals, directional shading, and gradual transitions between light and dark. Avoid making every petal identical or coloring each one with a single flat shade.
What colors should I use for a hibiscus drawing?
You can use red, pink, orange, yellow, peach, purple, or white. Choose a light base color, a richer middle tone, and a darker shadow color to create depth.
How do I draw a hibiscus without a reference?
Begin with a small center and five curved guidelines. Build broad petals around the center, overlap some of them, and add the long stamen. A reference is helpful for realism, but a simplified hibiscus can be drawn from this basic structure.
Can children follow this hibiscus drawing tutorial?
Yes. Children can simplify the process by drawing five large rounded petals around a circle and adding a long central line with small dots. Detailed veins and realistic shading can be added later according to their skill level.
Should I outline my hibiscus drawing with a pen?
A pen outline works well for cartoons, coloring pages, and decorative illustrations. For a realistic pencil drawing, it is usually better to keep the outline soft and use shading to define the edges.
How long does it take to draw a hibiscus flower?
A simple outline may take 10 to 20 minutes. A detailed pencil or colored drawing may take one hour or longer, depending on the size, shading, background, and level of realism.
Conclusion
A successful hibiscus flower drawing begins with simple shapes, not complicated details. Start by marking the center, arrange five broad petals around it, and add the flower’s distinctive long stamen. Once the main proportions look balanced, use curved veins, overlapping edges, controlled shading, and layered colors to create depth.
Do not expect your first flower to be perfect. Each sketch helps you understand curves, folds, proportions, and light more clearly. Practice the same hibiscus from several angles and experiment with pencil, markers, watercolor, or digital tools.
The best flower drawings are not always the most detailed ones. They are the drawings that capture the soft movement, open shape, and tropical beauty of the hibiscus.
Explore More Helpful Articles– Visit Now